前回の記事「Modbus/TCPでMELSEC iQ-FとEPCを接続」ではModbus/TCP通信を用い、MELSEC iQ-FシリーズのFX5UCとEPC 1502を接続しました。その仕組みを活用し、FX5UCのデータをEPCのHMI画面に表示させます。
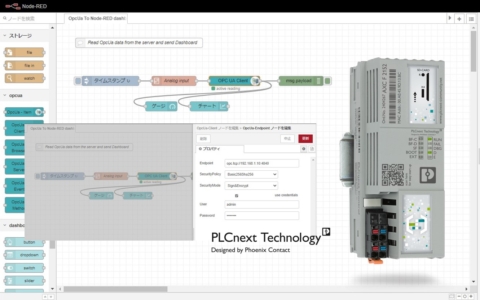
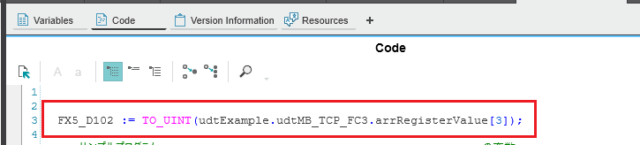
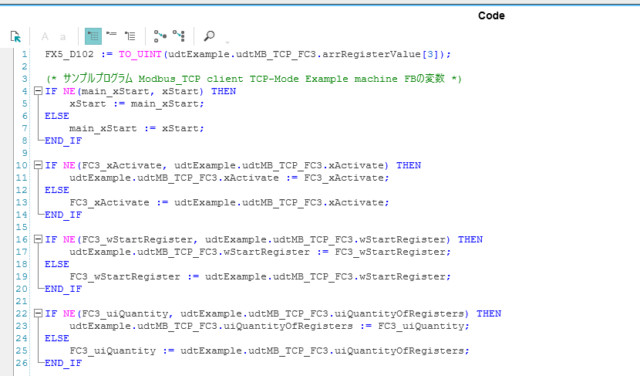
Modbus/TCP経由でFX5UCから取り込んだデータを、HMIで使用し易いように取り出します
![](https://plcnext.jp/wp-content/uploads/スクリーンショット-2022-04-25-192201-640x145.png)
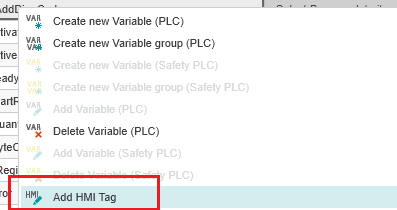
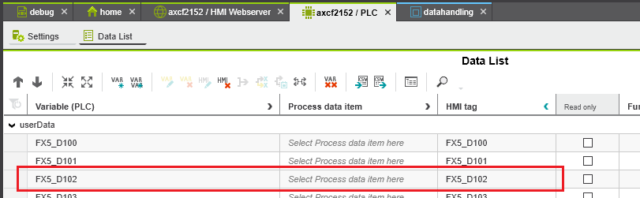
データを格納する変数に、HMI tagを設定します
![](https://plcnext.jp/wp-content/uploads/スクリーンショット-2022-04-25-193008.png)
![](https://plcnext.jp/wp-content/uploads/スクリーンショット-2022-04-25-192749-640x198.png)
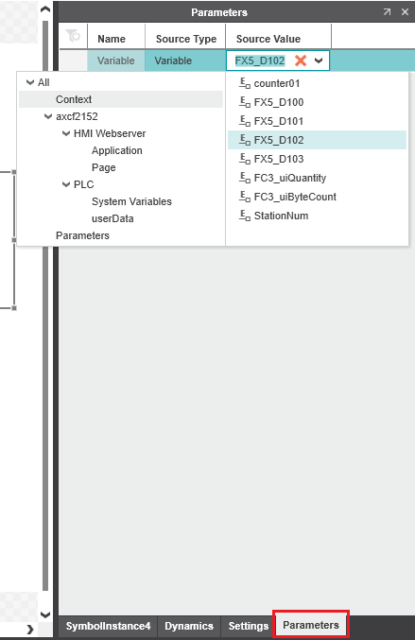
HMI画面に、数値を表示する部品を配置します
![](https://plcnext.jp/wp-content/uploads/スクリーンショット-2022-04-25-193644.png)
![](https://plcnext.jp/wp-content/uploads/スクリーンショット-2022-04-25-193712.png)
![](https://plcnext.jp/wp-content/uploads/スクリーンショット-2022-04-25-193926-640x280.png)
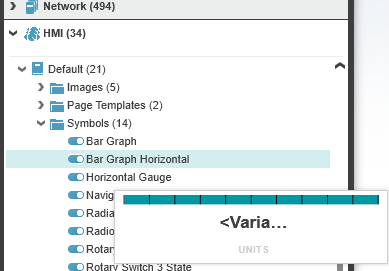
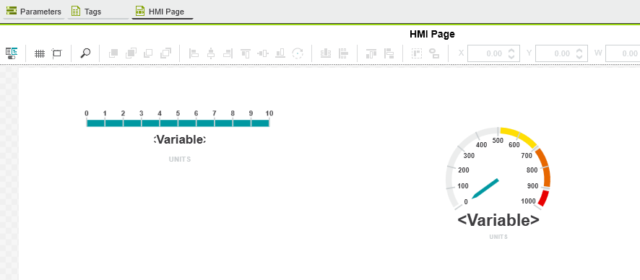
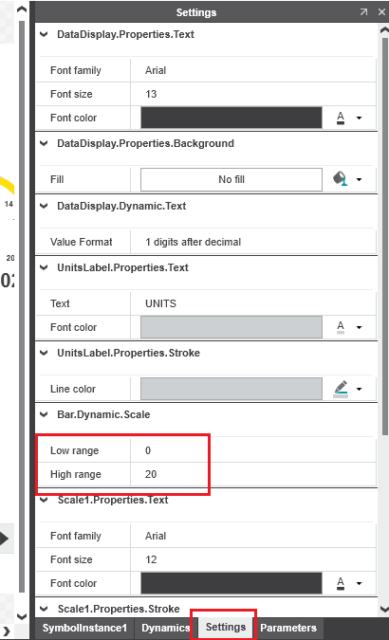
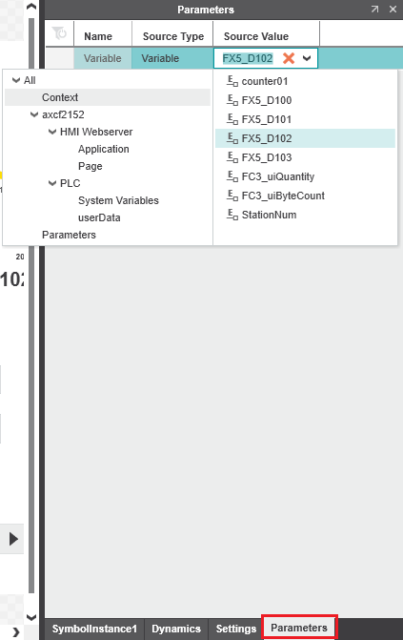
Bar Graph Holizontalの設定およびパラメータを変更します
![](https://plcnext.jp/wp-content/uploads/スクリーンショット-2022-04-25-203610-389x640.png)
![](https://plcnext.jp/wp-content/uploads/スクリーンショット-2022-04-25-203644-403x640.png)
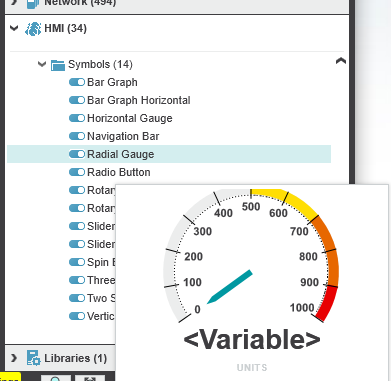
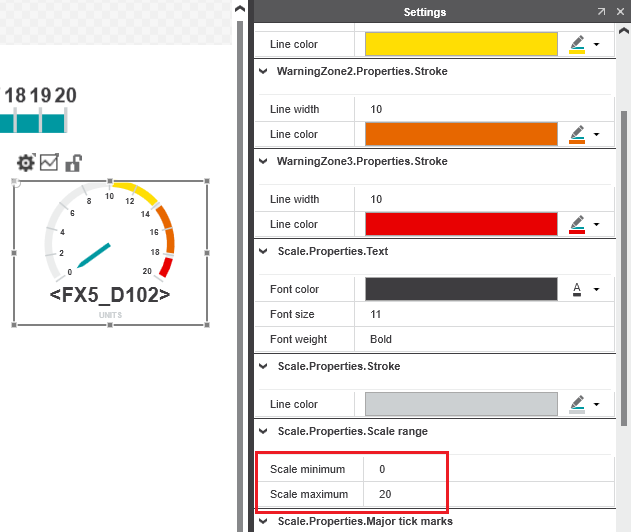
同様に、Radial Gaugeの設定およびパラメータを変更します
![](https://plcnext.jp/wp-content/uploads/スクリーンショット-2022-04-25-204154.png)
![](https://plcnext.jp/wp-content/uploads/スクリーンショット-2022-04-25-204220-415x640.png)
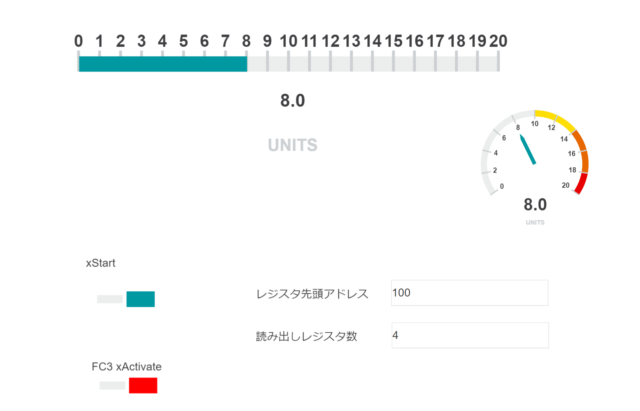
EPC 1502にプロジェクトを書き込み、オンラインモード下でModbus/TCP通信用の変数をセットすると通信を開始します。HMI画面を開くと、FX5UCのデータを見る事が出来ます
この手順ではファンクションブロックExampleMachineのxStartおよびMB_TCP_FC3ファンクションブロックのxActive、読み出し用パラメータのwStartRegisterとuiQuantityOfRegistersをオンラインモード下で手動でセットしています。通信シーケンスをプログラムで書いても良いのですが、今回はHMI画面からセットできるようにしてみました。
![](https://plcnext.jp/wp-content/uploads/スクリーンショット-2022-04-25-210113-640x411.png)
HMIから制御・参照可能とする変数を定義し、HMI tagを追加します。
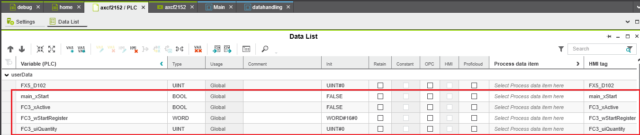
![](https://plcnext.jp/wp-content/uploads/スクリーンショット-2022-04-26-105019-640x135.png)
用意した変数に実データをコピーします。
![](https://plcnext.jp/wp-content/uploads/スクリーンショット-2022-04-26-105213-640x376.png)
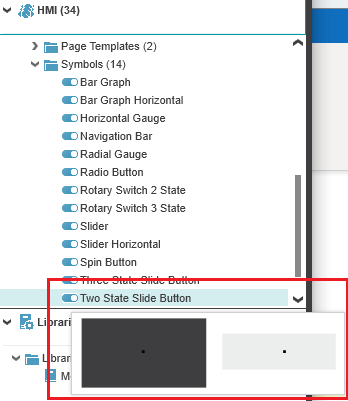
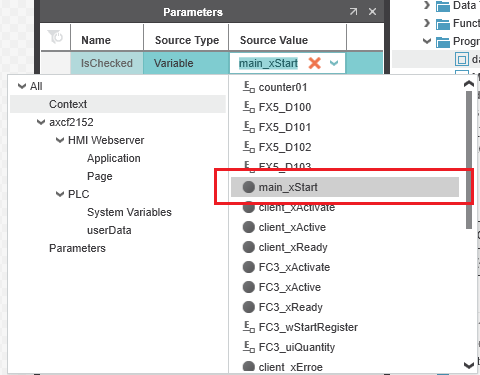
Two State Slide Buttonを画面に2つ配置し、対象とする変数を割り当てます。
![](https://plcnext.jp/wp-content/uploads/スクリーンショット-2022-04-26-105942.png)
![](https://plcnext.jp/wp-content/uploads/スクリーンショット-2022-04-26-110054.png)
![](https://plcnext.jp/wp-content/uploads/スクリーンショット-2022-04-26-110135.png)
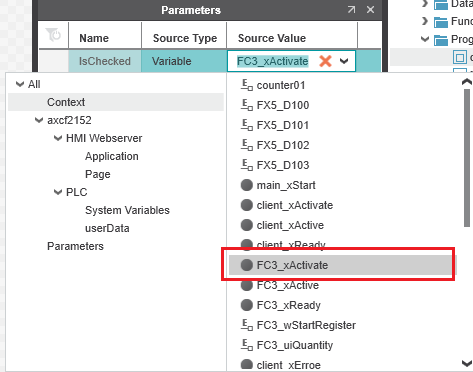
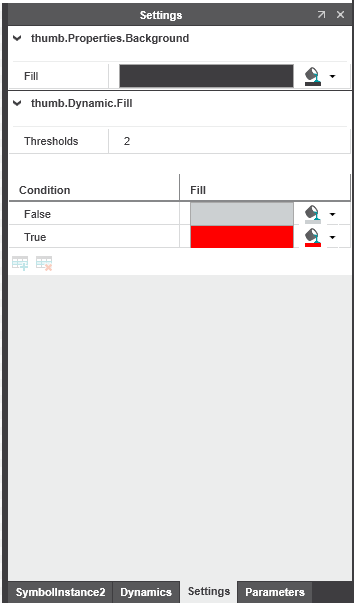
MB_TCP_FC3ファンクションブロック xActiveの色を赤に変えてみました。
![](https://plcnext.jp/wp-content/uploads/スクリーンショット-2022-04-26-110206.png)
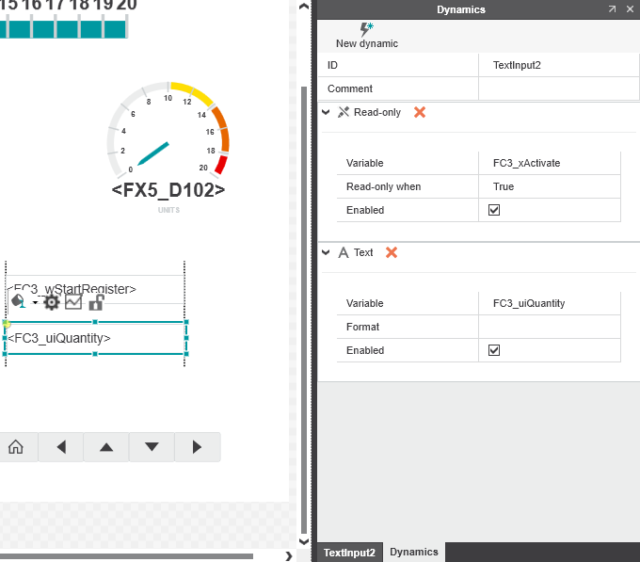
読み出し用パラメータのwStartRegisterとuiQuantityOfRegisters用のText Inputを配置し、変数を設定します。念のため、通信中(MB_TCP_FC3ファンクションブロックのxActivate=TRUE)はRead-onlyにしてあります。
![](https://plcnext.jp/wp-content/uploads/スクリーンショット-2022-04-26-110305-640x570.png)
![](https://plcnext.jp/wp-content/uploads/スクリーンショット-2022-04-26-110333-640x562.png)
以上です