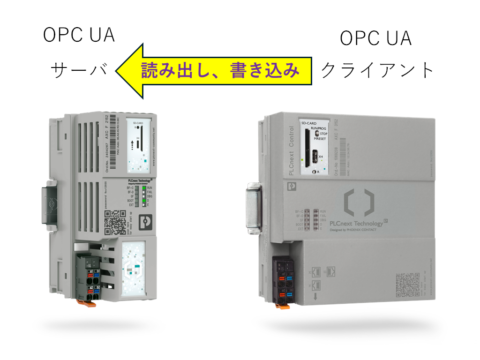
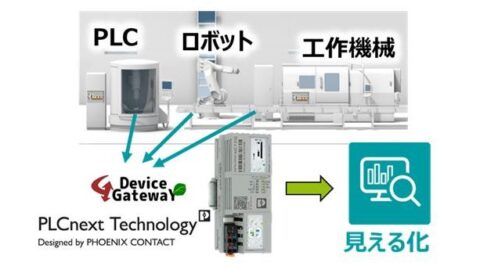
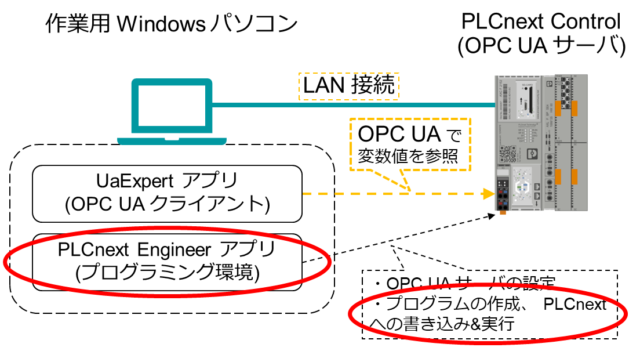
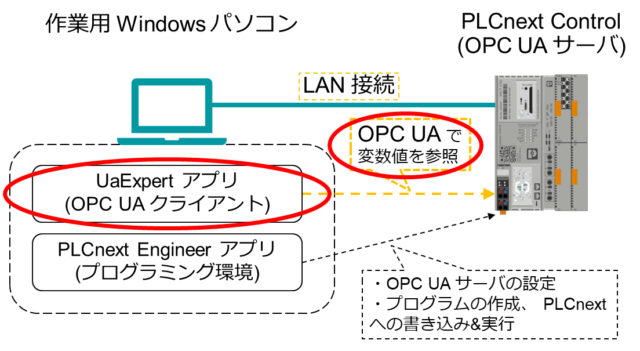
PLCnext に搭載されている OPC UA サーバへアクセスして変数値を取得するまでの具体的な手順を紹介します。
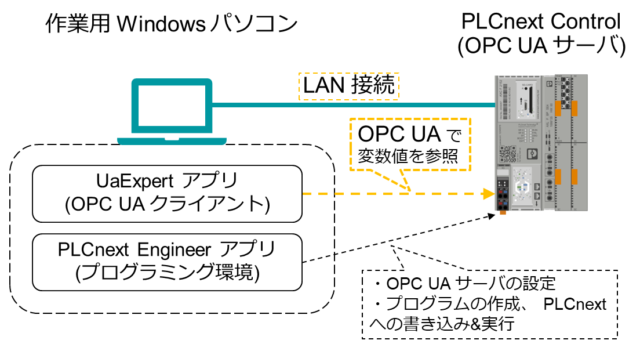
PLCnext 上の OPC UA サーバへのアクセス実験用環境
| アプリケーション種類 | 機材/ソフト |
|---|---|
| OPC UA サーバ | PLCnext コントローラ:AXC F 2152 |
| OPC UA クライアント | UaExpert (無償):Unified Automation 社製の OPC UA クライアントアプリ。Windows 用を使用します。 |
| プログラミング環境 | PLCnext Engineer (無償):PLCnext 用の開発環境アプリ。今回は ST 言語で極めて短いコードを作り、その中の変数をOPC UA クライアントから参照します。 |
ここでご紹介する手順は、簡易的な接続実験です。
セキュリティ上の観点から、UaExpert と PLCnext コントローラ間のネットワークは他の機器が接続されていないローカルネットワークとして構築してください。
PLCnext プロジェクトの用意
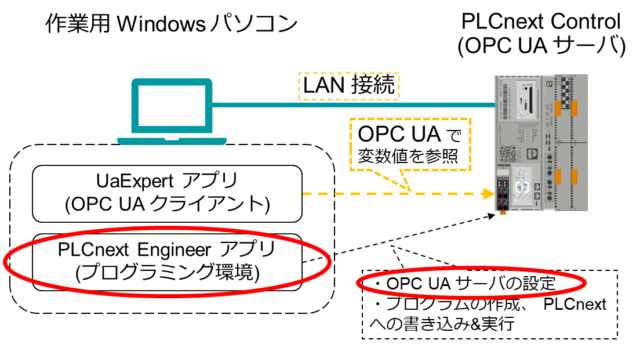
まず、PLCnext Engineer で 新しいプロジェクトを作成し、PLCnext の OPC UA サーバに関する設定を行います。
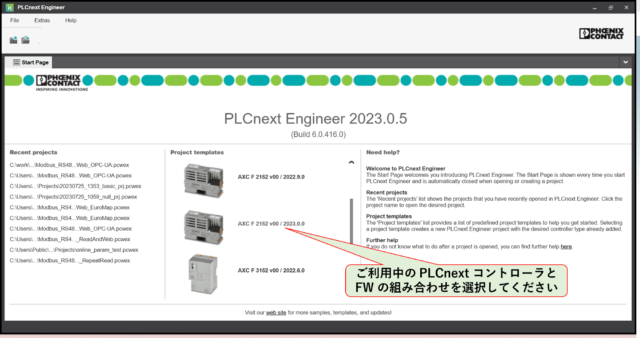
プロジェクトの新規作成
PLCnext Engineer を起動し、新しいプロジェクトを作成してください。
OPC UA Server の設定
PLANT ペイン内の OPC UA の項目から OPC UA Server の設定画面を出すことができます。
Information model -> Visibility of variables を Marked に設定します。

単純なサンプルプログラム
次に、プログラムの作成、書き込み&実行を行います。
ST言語で1行のプログラムを作成
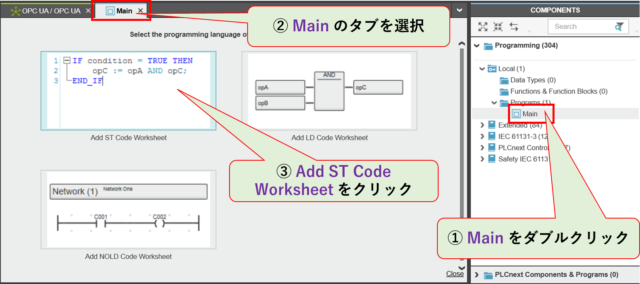
まず、COMPONENTS ペインにある Programming -> Local -> Programs -> Main をダブルクリックし、ST 言語 を選択してください。
表示されたエディター画面へ
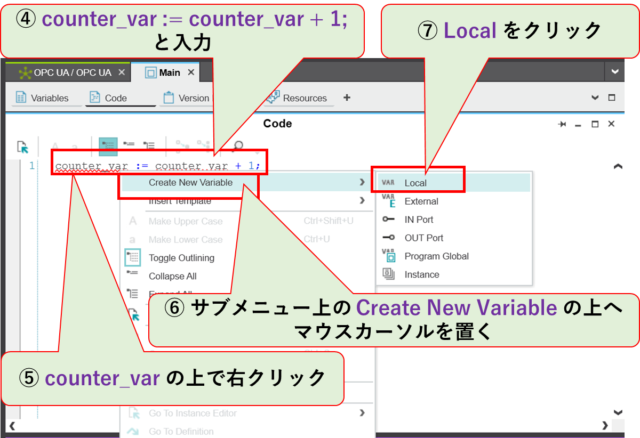
counter_var := counter_var + 1;
と入力してください。これは、counter_var という変数へ毎回 1 を加算する、という意味です。
counter_var の下に赤い波線が表示されるのは、まだ定義されていない変数である、というエラーです。
counter_var の上で右クリックし、Create New Variable -> Local を選択することでローカル変数として定義でき、赤い波線表示は消えます。
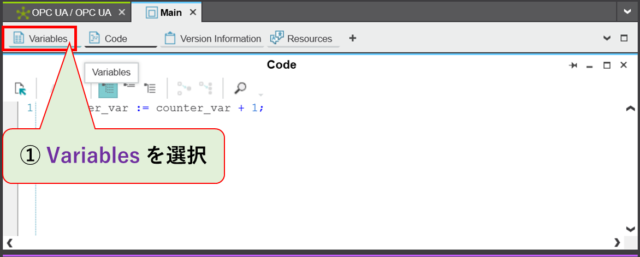
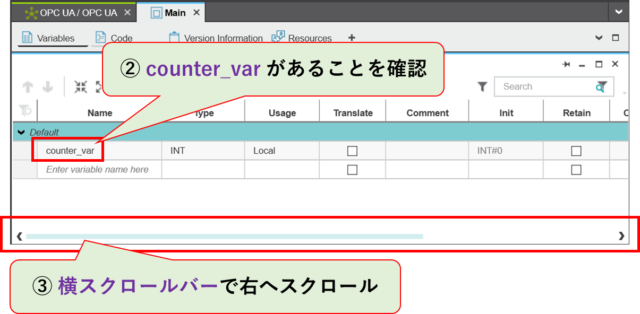
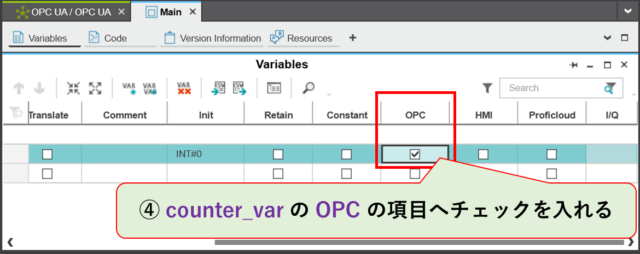
変数を OPC UA で公開
OPC UA クライアントから PLCnext の OPC UA サーバへアクセスしたときに counter_var 変数の値を操作できるよう設定します。
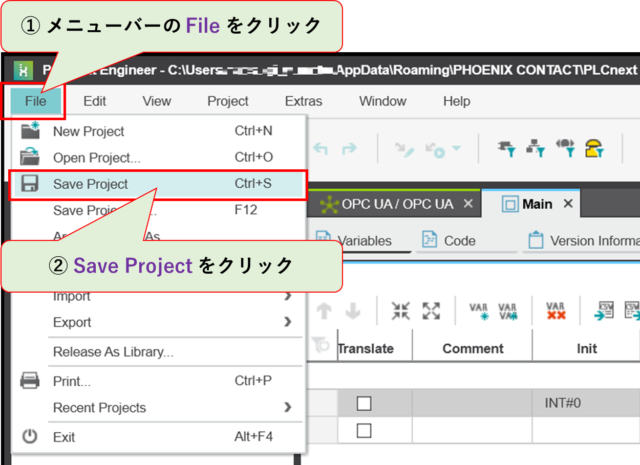
プロジェクトの書き込み
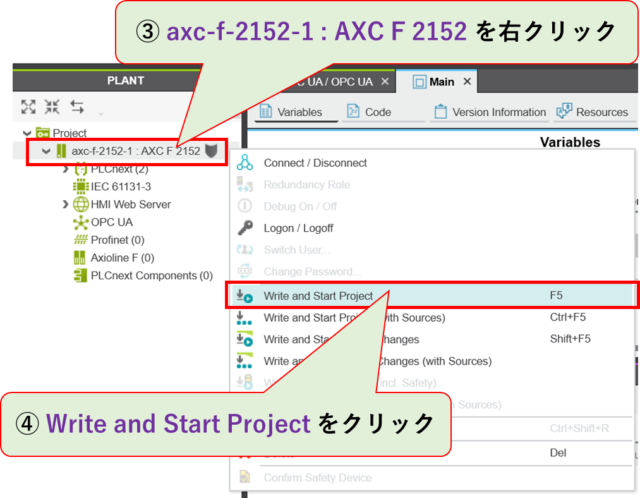
プロジェクトを一旦セーブした後、PLCnext コントローラへプロジェクトを書き込んでください。
プロジェクト書き込み先 PLCnext コントローラの IP アドレスの指定方法などについては、PLCnext Engineer のヘルプ等をご参照ください。
UaExpert による OPC UA サーバへのアクセス
最後に、UaExpert のインストールと、OPC UA サーバへのアクセスを行います。
UA Expert のダウンロードとインストール
Unified Automation 社のサイトから UaExpert をダウンロードし、インストールしてください。
ダウンロードには無料のユーザ登録が必要になります。
詳細は Unified Automation 社のサイトをご参照ください。
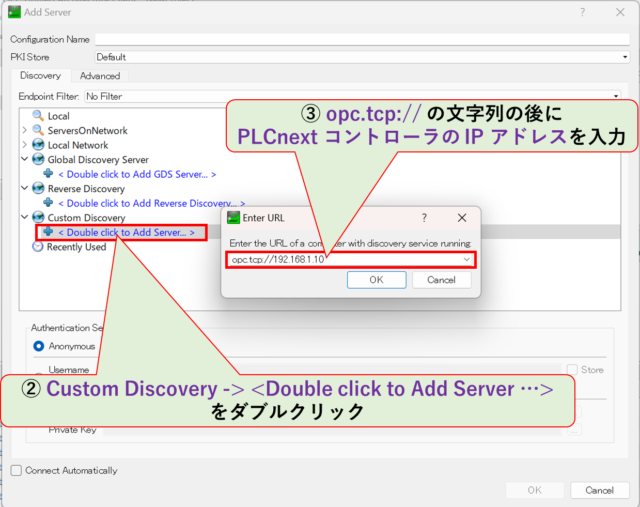
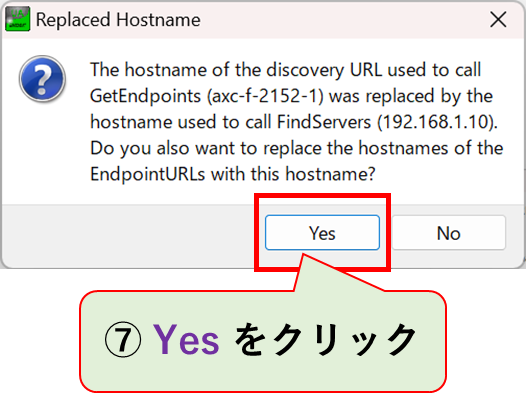
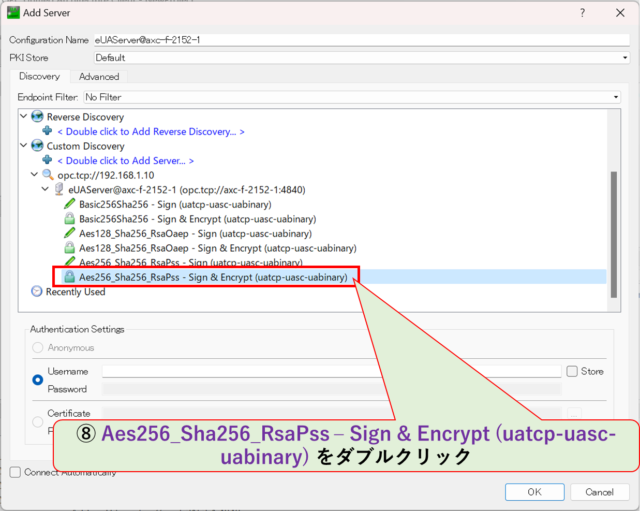
PLCnext コントローラへの接続設定
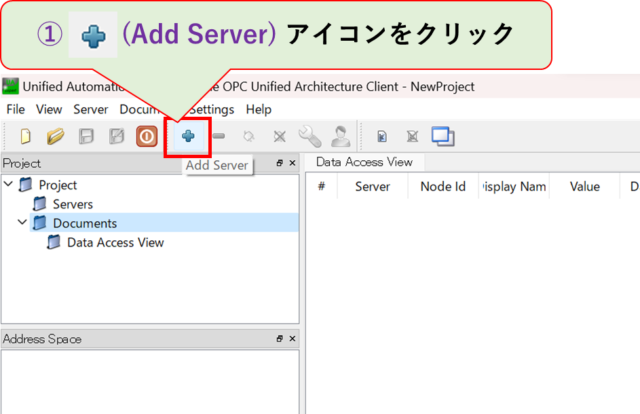
UA Expert を起動し、接続設定を行います。

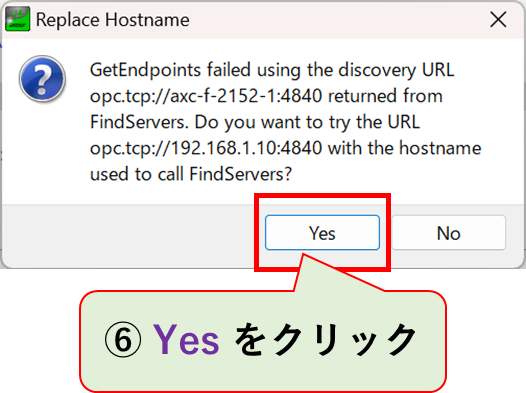
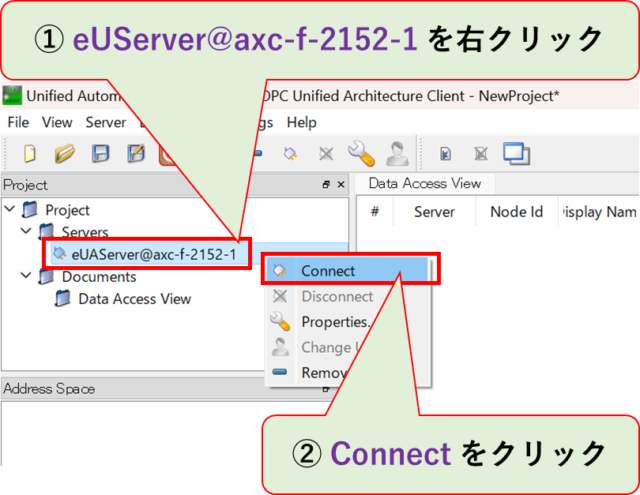
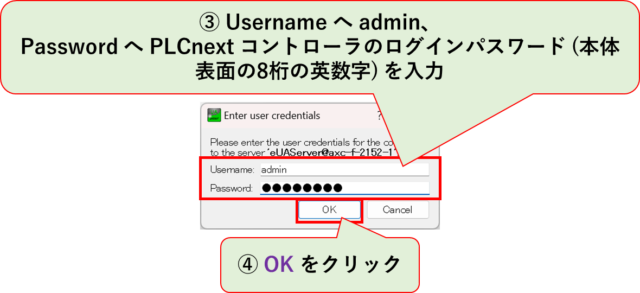
PLCnext コンローラへのアクセス
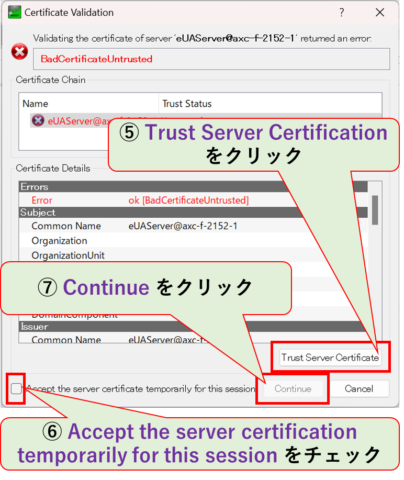
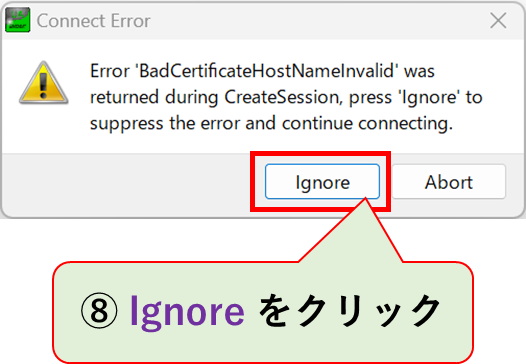
Server Certification に関する警告が出ますが、ローカルネットワーク上での簡易的な実験のため、「信頼できるサーバである」とし、そのような警告を無視するように設定します。
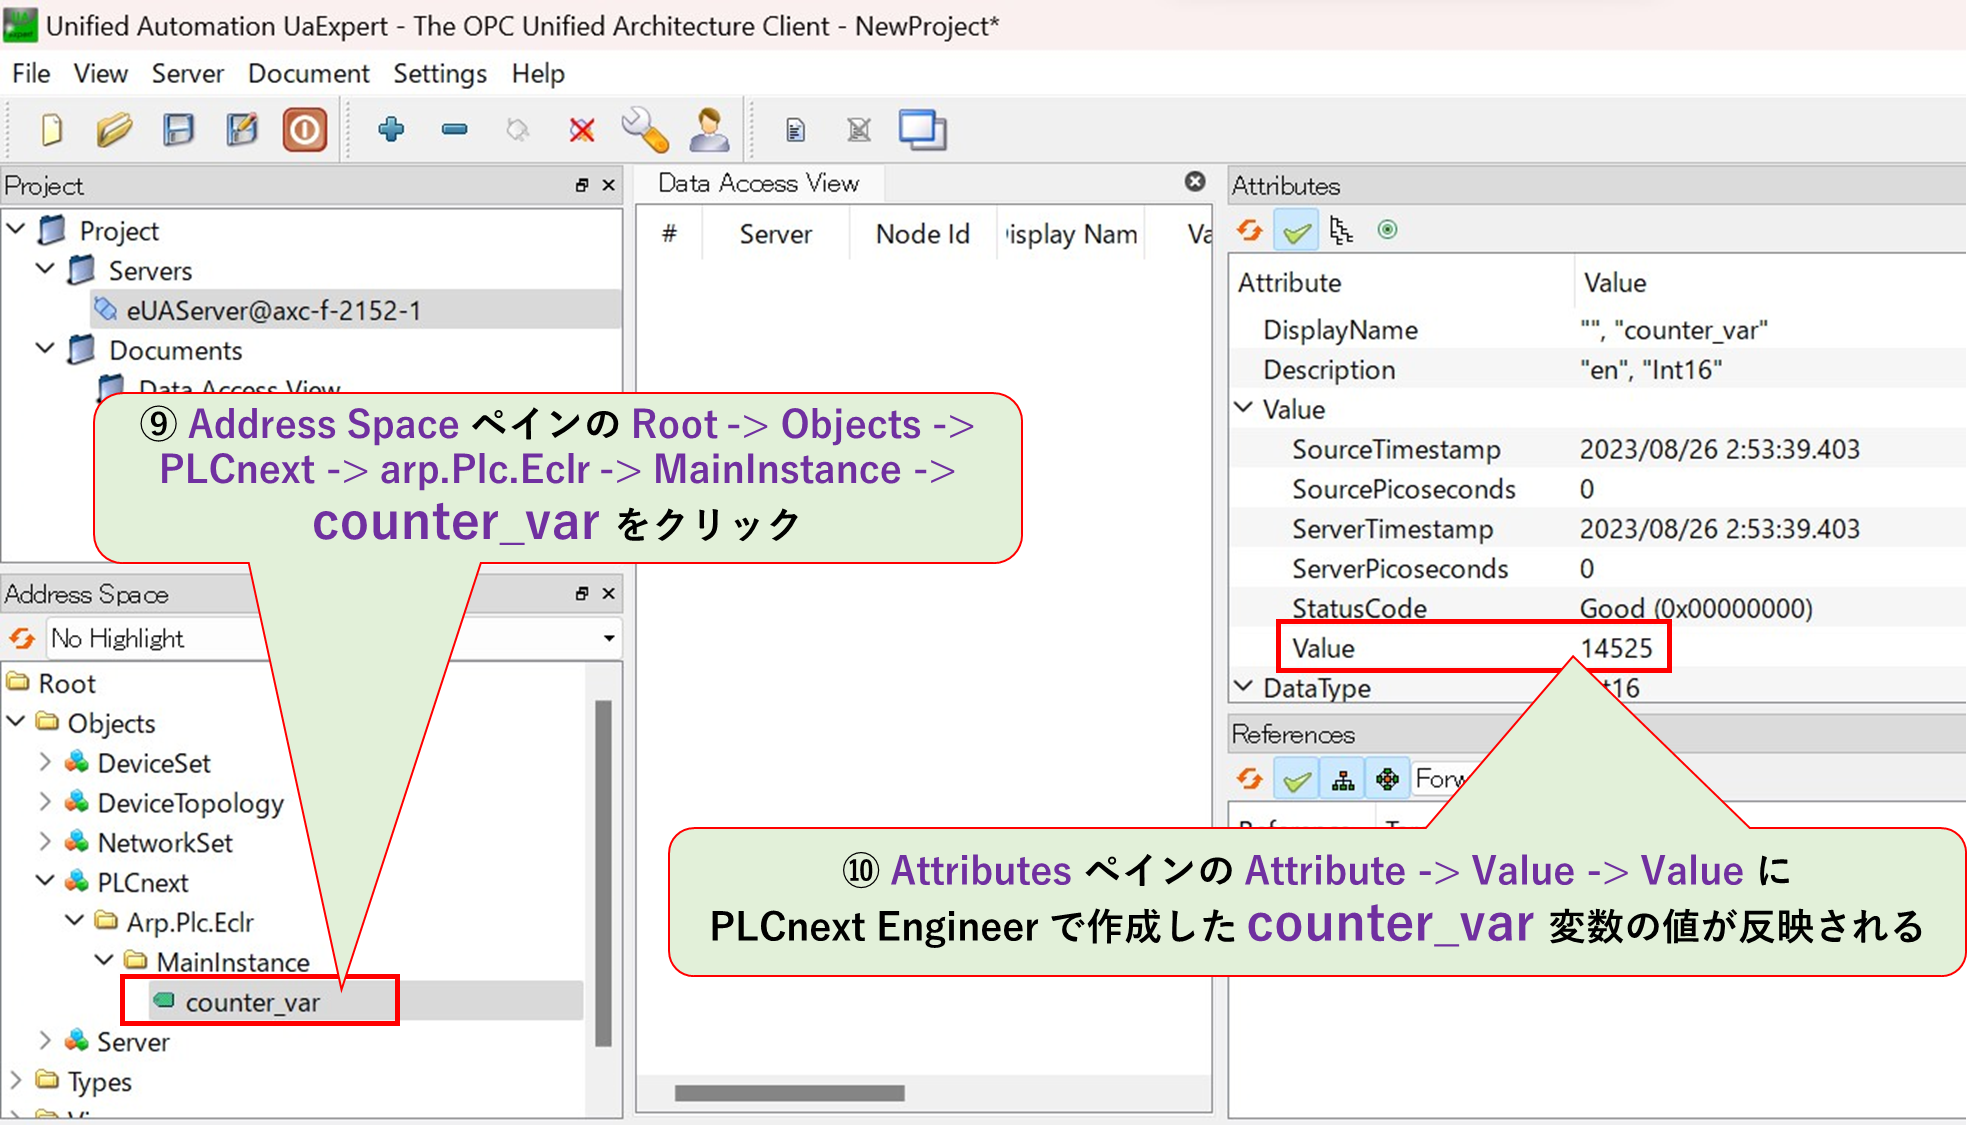
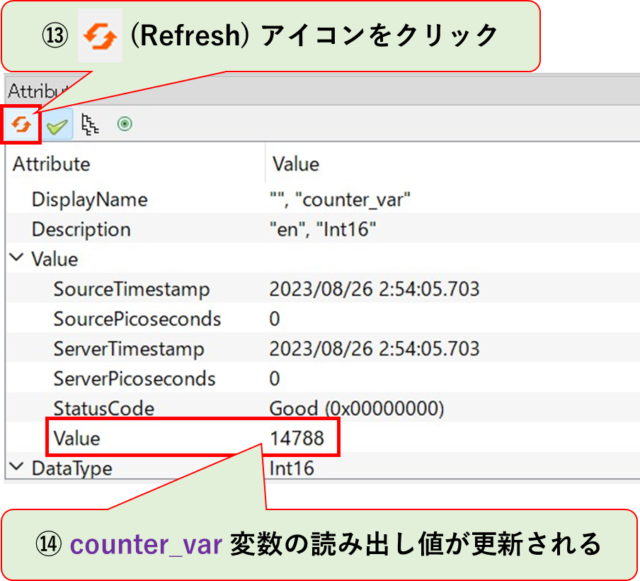
以下の様に、PLCnext Engineer で作成した counter_var 変数を参照できるようになります。
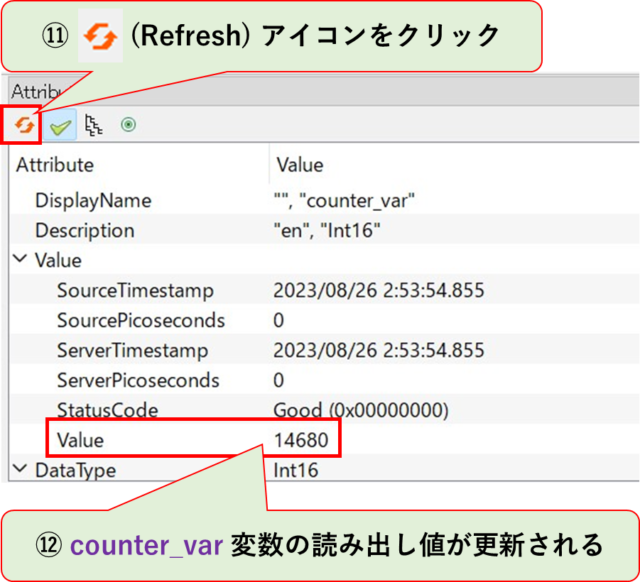
Refresh アイコンをクリックするたびに、counter_var 変数の読み出し値が更新されます。
以上で、PLCnext コントローラ上の変数へ OPC UA クライアントからアクセスするための手順です。